As someone who's spent countless hours on the road in my beloved RV, I've learned that a well-maintained AC unit is non-negotiable if you want a comfortable and enjoyable trip. And believe me, there's nothing worse than a malfunctioning AC when you're trying to relax and recharge after a day of adventure.
The good news is, keeping your RV's AC unit running at its best doesn't have to be a daunting task. With a few simple RV AC repair and maintenance routines, you can ensure efficient performance, avoid costly repairs or replacements, and—most importantly—keep your cool even when the temperatures soar. Here’s how RV owners can maintain their AC system for peak performance:
- Keeping RV AC filters clean
- Inspecting and cleaning the RV AC coils
- Checking RV AC refrigerant levels
- Inspecting and tightening RV AC electrical connections
- Maintaining the exterior of your RV AC unit
- Ensuring proper RV AC ventilation and airflow
In this article, we’ll walk you through essential RV AC maintenance techniques to keep your AC unit in peak performance, so you can focus on making good memories on the road.
Keeping RV AC Filters Clean
Your AC's filters are its “lungs.” They trap dust, dirt, and other airborne particles, ensuring that clean air circulates throughout your RV. When filters get clogged, your AC has to work harder, leading to reduced efficiency, higher energy bills, and even potential damage to the unit.
According to Camping World, keeping air filters clean is one of the most important steps to RV maintenance—and it’s also the easiest. Start by locating the filter(s). They're typically found behind the return air grille inside your RV. Carefully remove the filter and vacuum it to remove any loose debris. If it's washable (check the manufacturer's instructions), gently rinse it with warm water and let it fully dry before reinstalling. If it's disposable, replace it with a new one.
Pro Tips:
- Set a reminder to check your filters monthly during the cooling season. Trust me, it's a quick task that can prevent major headaches down the road.
- Keep spares on hand. Stock up on replacement filters so you're always prepared.
- Consider upgrading to high-efficiency filters. They might cost a bit more, but they'll trap even more particles, improving your RV's air quality and reducing strain on your AC.

Inspecting and Cleaning the RV AC Coils
Just like a dirty filter, dirty coils can restrict airflow and hinder your AC's performance. Both the evaporator coil (inside your RV) and the condenser coil (on the roof) need to be kept clean for optimal efficiency.
The evaporator coil is usually located behind the return air grille, near the filter. Use a soft brush or a specialized coil cleaner to gently remove any dust or debris. You can find coil cleaner on Amazon or at Home Depot. For the condenser coil, head up to the roof and carefully remove the shroud covering the AC unit. Again, use a soft brush or coil cleaner to remove any buildup.
Pro Tips:
- Try to inspect and clean your coils at least twice a year, especially before the start of the cooling season.
- The fins on the coils are delicate, so avoid using harsh brushes or excessive force.
- Choose a cool, dry day to clean the condenser coil on the roof, and always prioritize safety when working on top of your RV.
Checking RV AC Refrigerant Levels
Refrigerant is the lifeblood of your RV AC unit. It's responsible for absorbing heat and keeping your space cool. If the refrigerant level is low, your AC won't cool effectively and could even suffer damage.
While you can purchase gauges to check refrigerant levels yourself, this is a task best left to professionals. They have the expertise and equipment to accurately assess the refrigerant levels and replace the rooftop assembly if necessary.
Pro Tips:
- If you notice a decrease in cooling efficiency, it could be a sign of low refrigerant. Don't wait for the problem to get worse—schedule a professional inspection.
- I recommend having a professional check your refrigerant levels and overall AC system health at least once a year.
Inspecting and Tightening RV AC Electrical Connections
Loose electrical connections can cause your AC to malfunction or even create a safety hazard. Vibrations from travel and general wear and tear can loosen connections over time.
For a quick inspection, turn off the power to your AC unit at the breaker. Carefully remove the access panel to expose the electrical connections. Look for any loose wires or corroded terminals. Use a screwdriver to gently tighten any loose connections.
Pro Tips:
- Regularly inspect your electrical connections. I like to do this at the start of each camping season and after any particularly bumpy trips.
- Always turn off the power before working on electrical components. If you're unsure about anything, consult the professionals.
- Watch for signs of trouble. Flickering lights, unusual noises, or a burning smell could indicate electrical issues. Address these promptly to avoid further damage.
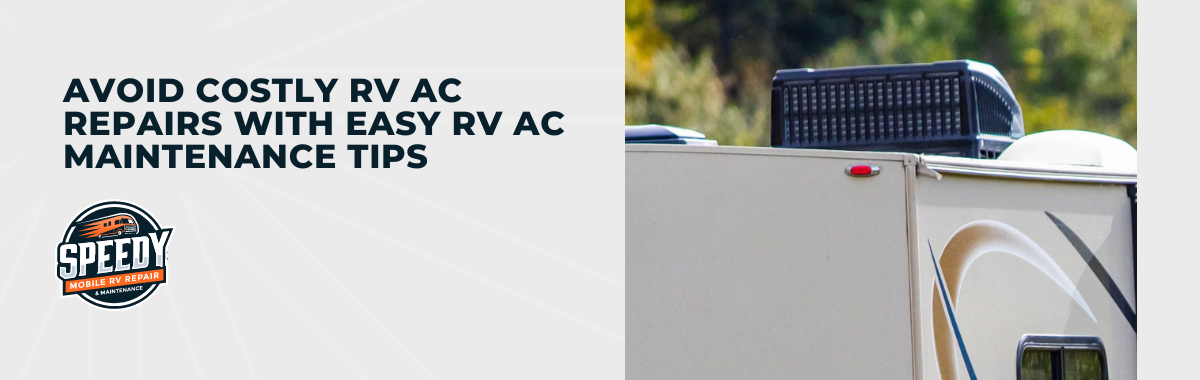
Maintaining the Exterior of Your RV AC Unit
Keeping the exterior of your AC unit clean and free of debris helps ensure proper airflow and prevents damage to the components.
To clean the outside of your AC unit, simply use a soft brush or a damp cloth to gently remove any dirt, leaves, or other debris from the exterior of the unit. As I’m cleaning, I typically check for any signs of physical damage, like cracks or dents, and address them promptly.
Pro Tips:
- I make sure to inspect the exterior of my entire RV after every trip. A quick visual check can help you identify any potential issues early on, whether with the AC or anything else.
- Clear away any obstructions, making sure there's adequate clearance around the unit for proper airflow.
- Cover your AC unit when you aren’t using it to protect it from the elements and prevent debris from accumulating.

Ensuring Proper RV AC Ventilation and Airflow
Without good airflow, your RV’s AC won’t work efficiently. Blocked vents or restricted airflow can strain the system and reduce its cooling capacity.
Start by checking all the vents inside your rig, making sure they're open and unobstructed. Don’t put furniture or other objects in front of vents. Also, make sure the return air grille, where the air filter is located, is clear of any obstructions.
Pro Tips:
- Regularly inspect your vents and ducts, ensuring they're clean and free of dust or debris.
- If you notice any vents are blocked, move furniture or other objects to ensure proper airflow.
- Consider adding vent boosters or fans. If you have areas in your RV that tend to be warmer, vent boosters or small fans can help improve air circulation.
Proactive RV AC Maintenance Is the Key to Stress-Free Adventures
All it takes is a little preventative care to keep your RV AC unit running reliably for years to come. And if you ever encounter an issue that you're not comfortable tackling yourself, the best solution is to reach out to a professional for comprehensive and reliable RV AC repair and maintenance services.
